
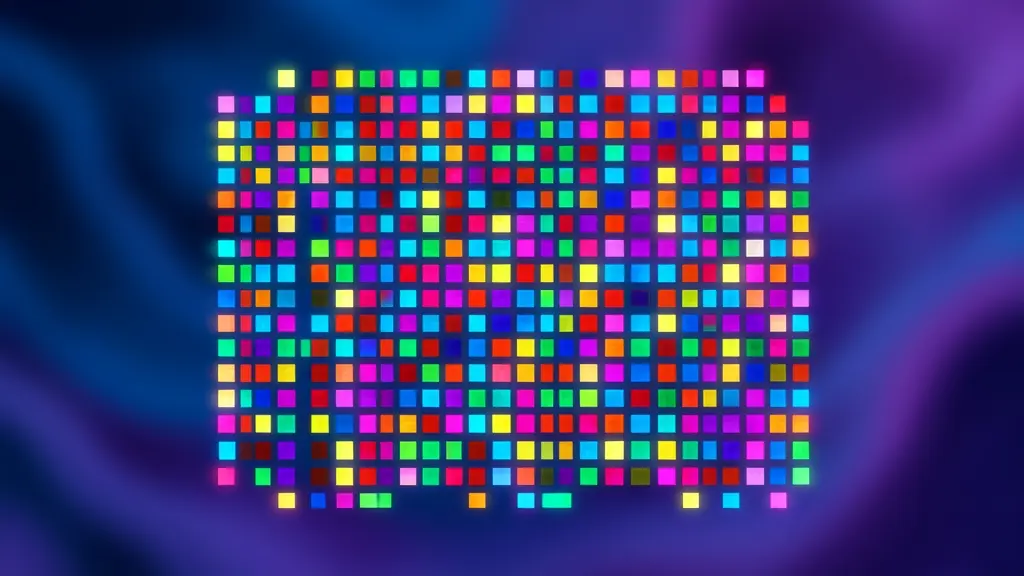
When Your Frontend Needs to Get Crafty: Image Processing and Generative Art in the Browser
Pushing complex image processing and generative art into the browser might seem like a performance nightmare, but with modern web APIs, it's more feasible and powerful than you think. Let's build a tool that turns photos into pixel art, exploring how we can harness Web Workers and the Canvas API to
by Sunil Band
Beyond the UI: Image Manipulation in the Browser
Most of the time, our frontend applications are about data entry, display, and interaction. We fetch data, render components, and submit forms. But what happens when the core of your application isn't just showing data, but creating new data, or transforming existing media in complex ways? Traditionally, heavy-duty tasks like image processing or generating intricate patterns were server-side concerns. You'd upload a file, wait for the backend to crunch it, and then download the result. This approach adds latency, server load, and often a clunky user experience.
But the browser has evolved. With powerful APIs like Canvas, Web Workers, and increasingly, WebAssembly, we can push a surprising amount of computational work to the client. This dramatically improves responsiveness, reduces server costs, and enables a whole new class of interactive, creative applications. I'm talking about things like image editors, CAD tools, or even generative art platforms, all running directly in your users' browsers. It means your users get instant feedback and a more fluid creative flow.
Let's explore this by building a tool that takes an image and converts it into a pixelated, cross-stitch-like pattern, all within the browser. This isn't just a toy example; it demonstrates the core techniques needed for any significant client-side image manipulation project.
The Core Challenge: Pixels and Performance
Converting an image to a cross-stitch pattern involves a few steps:
- Resizing and Downsampling: Reduce the image to a much smaller resolution, effectively creating large 'pixels' that represent the 'stitches'.
- Color Quantization: Limit the number of unique colors in the image to a predefined palette, simulating thread colors.
- Dithering (Optional but Recommended): Apply a dithering algorithm to simulate a wider range of colors with a limited palette, improving perceived detail.
- Upscaling (for display): Scale the pixelated image back up for a clear display, often with a 'nearest neighbor' algorithm to maintain sharp pixel edges.
Each of these steps involves iterating over potentially millions of pixels. Doing this on the main thread will lock up the UI, making your application feel sluggish and unresponsive. This is where Web Workers become indispensable.
Offloading Work with Web Workers
Web Workers allow you to run scripts in a background thread, separate from the main execution thread of your web page. This means your UI remains responsive while heavy computations churn away. Communication between the main thread and a worker happens via postMessage and onmessage events, sending copies of data (or transferring ownership for large objects like ArrayBuffers).
Here's how we can structure our image processing flow with a worker:
// main-thread.ts
const worker = new Worker(new URL('./image-processor.worker.ts', import.meta.url));

worker.onmessage = (event: MessageEvent<{ pixelData: ImageData }>) => {
  // When the worker finishes, receive the processed pixel data
  const { pixelData } = event.data;
  // Draw pixelData to a canvas on the main thread
  const canvas = document.getElementById('outputCanvas') as HTMLCanvasElement;
  const ctx = canvas.getContext('2d');
  if (ctx) {
    canvas.width = pixelData.width;
    canvas.height = pixelData.height;
    ctx.putImageData(pixelData, 0, 0); // Display the result
  }
  console.log('Image processing complete!');
};

async function processImage(imageBitmap: ImageBitmap) {
  const offscreenCanvas = new OffscreenCanvas(imageBitmap.width, imageBitmap.height);
  const ctx = offscreenCanvas.getContext('2d');
  if (!ctx) throw new Error('Could not get OffscreenCanvas context');

  ctx.drawImage(imageBitmap, 0, 0); // Draw the original image to get its pixel data
  const originalImageData = ctx.getImageData(0, 0, imageBitmap.width, imageBitmap.height);

  // Send the pixel data and processing options to the worker
  worker.postMessage({
    type: 'process',
    imageData: originalImageData,
    options: { pixelSize: 10, colors: ['#FF0000', '#00FF00', '#0000FF'] }
  }, [originalImageData.data.buffer]); // Transfer the ArrayBuffer for efficiency
}

// Example usage: load an image and process it
const img = new Image();
img.crossOrigin = 'anonymous'; // Important for loading images from different origins
img.onload = async () => {
  const imageBitmap = await createImageBitmap(img); // Use ImageBitmap for efficient worker transfer
  processImage(imageBitmap);
};
img.src = 'https://picsum.photos/800/600'; // Replace with your image source
The Worker's Engine: Canvas API and Pixel Manipulation
Inside image-processor.worker.ts, we'll perform the actual pixel crunching. The Canvas API is our workhorse here. We can draw images onto a canvas, read their pixel data using getImageData, and then manipulate the data property of the ImageData object, which is a Uint8ClampedArray containing [R, G, B, A] values for each pixel.
// image-processor.worker.ts
import { applyPixelation, quantizeColors, ditherImage } from './image-processing-utils';

self.onmessage = (event: MessageEvent<{
  type: 'process';
  imageData: ImageData;
  options: { pixelSize: number; colors: string[] };
}>) => {
  if (event.data.type === 'process') {
    const { imageData, options } = event.data;
    const { pixelSize, colors } = options;

    // Step 1: Pixelate/Downsample
    const pixelatedData = applyPixelation(imageData, pixelSize); // Custom utility function

    // Step 2: Color Quantization + Dithering
    const quantizedAndDitheredData = ditherImage(
      pixelatedData,
      colors.map(hexToRgb), // Convert hex colors to RGB for processing
      'FloydSteinberg' // Example dithering algorithm
    );

    // Create a new ImageData object from the processed data
    const finalImageData = new ImageData(
      quantizedAndDitheredData.data,
      quantizedAndDitheredData.width,
      quantizedAndDitheredData.height
    );

    // Send the processed ImageData back to the main thread
    self.postMessage({ pixelData: finalImageData }, [finalImageData.data.buffer]);
  }
};

// Helper to convert hex color to RGB array [R, G, B]
function hexToRgb(hex: string): [number, number, number] {
  const bigint = parseInt(hex.slice(1), 16);
  const r = (bigint >> 16) & 255;
  const g = (bigint >> 8) & 255;
  const b = bigint & 255;
  return [r, g, b];
}
Implementing the Processing Steps
The actual pixel manipulation logic can get complex, but the core idea is simple: iterate over the Uint8ClampedArray and modify pixel values. Here's a simplified view of applyPixelation and ditherImage functions. For a real-world scenario, you'd likely use more sophisticated algorithms or even a library for color quantization and dithering.
// image-processing-utils.ts

// A utility function to get the average color of a block of pixels
function getAverageColor(imageData: ImageData, x: number, y: number, blockSize: number): [number, number, number, number] {
  let r = 0, g = 0, b = 0, a = 0, count = 0;
  for (let dy = 0; dy < blockSize; dy++) {
    for (let dx = 0; dx < blockSize; dx++) {
      const pixelX = x + dx;
      const pixelY = y + dy;
      if (pixelX < imageData.width && pixelY < imageData.height) {
        const i = (pixelY * imageData.width + pixelX) * 4;
        r += imageData.data[i];
        g += imageData.data[i + 1];
        b += imageData.data[i + 2];
        a += imageData.data[i + 3];
        count++;
      }
    }
  }
  return count > 0 ? [r / count, g / count, b / count, a / count] : [0, 0, 0, 0];
}

// Simplistic pixelation: average colors in blocks
export function applyPixelation(imageData: ImageData, pixelSize: number): ImageData {
  const outputData = new Uint8ClampedArray(imageData.data.length);
  const { width, height } = imageData;

  for (let y = 0; y < height; y += pixelSize) {
    for (let x = 0; x < width; x += pixelSize) {
      const [avgR, avgG, avgB, avgA] = getAverageColor(imageData, x, y, pixelSize);

      for (let dy = 0; dy < pixelSize; dy++) {
        for (let dx = 0; dx < pixelSize; dx++) {
          const targetX = x + dx;
          const targetY = y + dy;
          if (targetX < width && targetY < height) {
            const i = (targetY * width + targetX) * 4;
            outputData[i] = Math.round(avgR);
            outputData[i + 1] = Math.round(avgG);
            outputData[i + 2] = Math.round(avgB);
            outputData[i + 3] = Math.round(avgA);
          }
        }
      }
    }
  }
  return new ImageData(outputData, width, height);
}

// Very basic dithering (Floyd-Steinberg simplified)
export function ditherImage(imageData: ImageData, palette: [number, number, number][], algorithm: string): ImageData {
  const { width, height, data } = imageData;
  const outputData = new Uint8ClampedArray(data);

  for (let y = 0; y < height; y++) {
    for (let x = 0; x < width; x++) {
      const i = (y * width + x) * 4;
      const oldR = outputData[i];
      const oldG = outputData[i + 1];
      const oldB = outputData[i + 2];

      // Find the closest color in the palette
      let minDistance = Infinity;
      let closestColor: [number, number, number] = [0, 0, 0];
      for (const pColor of palette) {
        const dist = Math.sqrt(
          Math.pow(oldR - pColor[0], 2) +
          Math.pow(oldG - pColor[1], 2) +
          Math.pow(oldB - pColor[2], 2)
        );
        if (dist < minDistance) {
          minDistance = dist;
          closestColor = pColor;
        }
      }

      const newR = closestColor[0];
      const newG = closestColor[1];
      const newB = closestColor[2];

      outputData[i] = newR;
      outputData[i + 1] = newG;
      outputData[i + 2] = newB;

      // Calculate error
      const errR = oldR - newR;
      const errG = oldG - newG;
      const errB = oldB - newB;

      // Distribute error to neighboring pixels (simplified Floyd-Steinberg weights)
      // [x+1, y]  [x-1, y+1] [x, y+1] [x+1, y+1]
      // We'll just do a very basic propagation to the right and below for simplicity

      const distributeError = (targetX: number, targetY: number, multiplier: number) => {
        if (targetX < width && targetY < height) {
          const targetIdx = (targetY * width + targetX) * 4;
          outputData[targetIdx] = Math.min(255, Math.max(0, outputData[targetIdx] + errR * multiplier));
          outputData[targetIdx + 1] = Math.min(255, Math.max(0, outputData[targetIdx + 1] + errG * multiplier));
          outputData[targetIdx + 2] = Math.min(255, Math.max(0, outputData[targetIdx + 2] + errB * multiplier));
        }
      };

      // Apply weights (simplified)
      distributeError(x + 1, y, 7/16);
      distributeError(x - 1, y + 1, 3/16);
      distributeError(x, y + 1, 5/16);
      distributeError(x + 1, y + 1, 1/16);
    }
  }
  return new ImageData(outputData, width, height);
}
This ditherImage function implements a very basic version of Floyd-Steinberg dithering. In reality, implementing robust dithering and color quantization algorithms from scratch can be quite involved. For production, you might reach for a library, but understanding the underlying pixel manipulation is key to debugging and optimizing.
The Display Layer: CSS and Canvas Scaling
After the worker sends back the processed ImageData, we draw it onto a visible canvas. If the processed image is very low resolution (e.g., 80x60 pixels), we need to scale it up for display without blurring the pixels. This is crucial for maintaining that distinct 'pixel art' or 'cross-stitch' look.
<canvas id="outputCanvas" style="image-rendering: pixelated; width: 100%; height: auto;"></canvas>The image-rendering: pixelated; CSS property is the magic here. It tells the browser to use a nearest-neighbor scaling algorithm, preserving the sharp edges of individual pixels when the canvas is scaled up by CSS or the browser's internal rendering. Without it, you'd get blurry anti-aliased pixels, which defeats the purpose.
Trade-offs and Considerations
While powerful, client-side image processing isn't a silver bullet. There are a few important considerations:
- Memory Usage: Large images, especially at high resolutions, can consume significant memory. Each pixel
ImageDatarequires 4 bytes (RGBA). A 4K image (3840x2160) is roughly 33MB. Duplicating this data (e.g., for original and processed versions) can quickly add up. Be mindful of image dimensions and consider processing in chunks for extremely large inputs. - Computational Complexity: Some algorithms are inherently more complex. While JavaScript performance has improved drastically, certain operations (like complex convolutions or machine learning inference) might still be better suited for WebAssembly or a server if raw speed is paramount.
- Browser API Support: While Web Workers and Canvas are widely supported, newer features like
OffscreenCanvas(which allows drawing to a canvas directly from a worker) might have slightly less universal support. Always check compatibility if you're targeting older browsers. - Error Handling and Debugging: Debugging code in Web Workers can be a bit trickier than main thread code. Browser dev tools have improved, but you still need to be aware of the separate execution context. Proper error boundaries and robust
try...catchblocks are essential. - User Experience: Even with Web Workers, processing very large images can still take a noticeable amount of time. Provide clear loading indicators, progress bars, and consider allowing users to cancel long-running operations. Progressive rendering (showing a low-res preview first) can also enhance the UX.
Future Horizons: WebAssembly and GPU Acceleration
For truly compute-intensive tasks, WebAssembly (Wasm) is the next frontier. You can write your core image processing algorithms in languages like Rust or C++ and compile them to Wasm. This often provides near-native performance, significantly outperforming JavaScript for CPU-bound computations.
Furthermore, for graphics-intensive operations, WebGPU (the successor to WebGL) is emerging. WebGPU allows direct access to the user's GPU from the browser, enabling highly parallel computations. This is ideal for things like real-time filters, advanced rendering, or even training small machine learning models on images. Imagine applying complex artistic filters in real-time, leveraging the user's graphics card, without ever hitting a server.
Wrapping up
Pushing image processing to the browser opens up a world of possibilities for creative and interactive applications that feel instant and delightful. By intelligently using Web Workers to keep the UI responsive and mastering the Canvas API for pixel manipulation, you can build powerful tools that were once thought to be exclusively backend territory.
Your next step should be to clone a simple image manipulation project or start a new Vite app. Implement a basic grayscale filter using getImageData and putImageData within a Web Worker. Then, try adding a pixelation effect. Experiment with different pixelSize values and observe the performance impact, especially on larger images. Once you have that working, you'll have a solid foundation for more advanced client-side media transformations. Don't be afraid to get your hands dirty with pixels; it's a surprisingly rewarding corner of frontend development.

When Your Typescript Needs a Real Workout: Diving into Type Challenges
I've seen countless teams struggle with TypeScript, not because they don't understand the basics, but because they haven't truly pushed its type system to its limits. This isn't just about avoiding `any`; it's about leveraging the compiler to enforce complex invariants at compile time. That's where

When Your React App Renders Twice and No One Knows Why: Understanding Hydration
Ever built a React app that seems to flicker on load, or worse, throws hydration errors that make no sense? You're not alone. I've been down the React hydration rabbit hole, and it's a critical concept for anyone building performant and stable server-rendered React applications.

When Your Database Needs to Think: Adding AI Search with pgvector
Semantic search using embeddings is a game-changer, but integrating it often feels like a separate service problem. What if your existing Postgres database could handle it natively?


















